Wondering how to convert videos from YouTube to GIF? Read this article to find out how to do it easily.
GIFs are animated images much like videos without a sound. They're usually short in duration and loop endlessly.
Any video can be converted to a GIF including YouTube videos. Most users usually convert a specific portion of YouTube videos into a GIF file to share on other websites and platforms such as Discord, Facebook, and Twitter.
There are many YouTube to GIF makers available online, but many fail to do the job properly.
One of the best ways to convert a YouTube video to GIF is by using SnapDownloader. It lets you download YouTube videos as GIF files instantly and easily. All you need to do is select the portion of the video to convert to GIF and adjust the optional settings such as FPS and resolution.
In this tutorial, you'll learn how to convert YouTube to GIF using SnapDownloader.
How to make a GIF from a YouTube video?
1. Download SnapDownloader
Download and install SnapDownloader on your computer. It works with both Windows and macOS.

2. Copy the YouTube video link
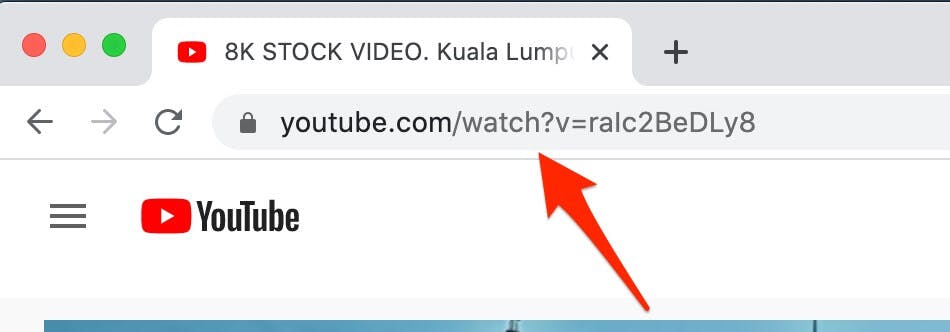
Go to YouTube and open that video that you want to download as GIF. Next, copy its link from your browser's address bar.
3. Paste the link in SnapDownloader
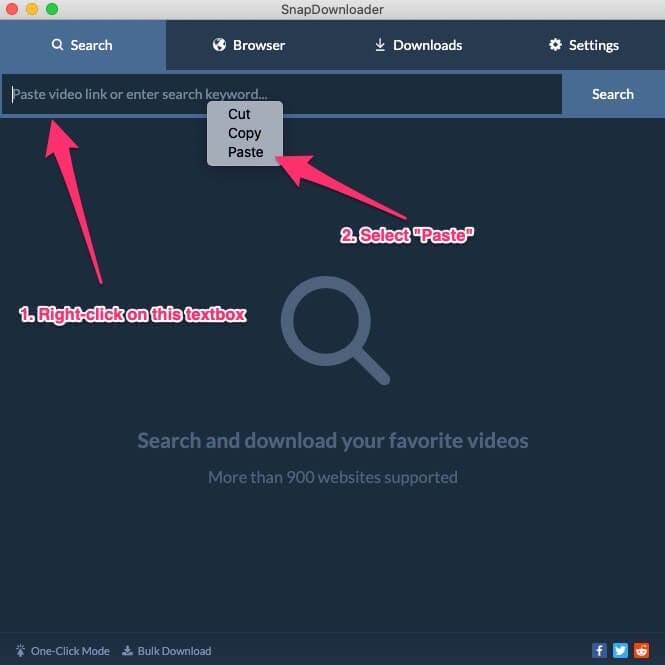
Open SnapDownloader and go to the "Search" tab. Right-click on the search textbox and select Paste.
Alternatively, you can click on the search textbox and press the CTRL+V (or CMD+V) to paste the link.
4. Set the output format to GIF
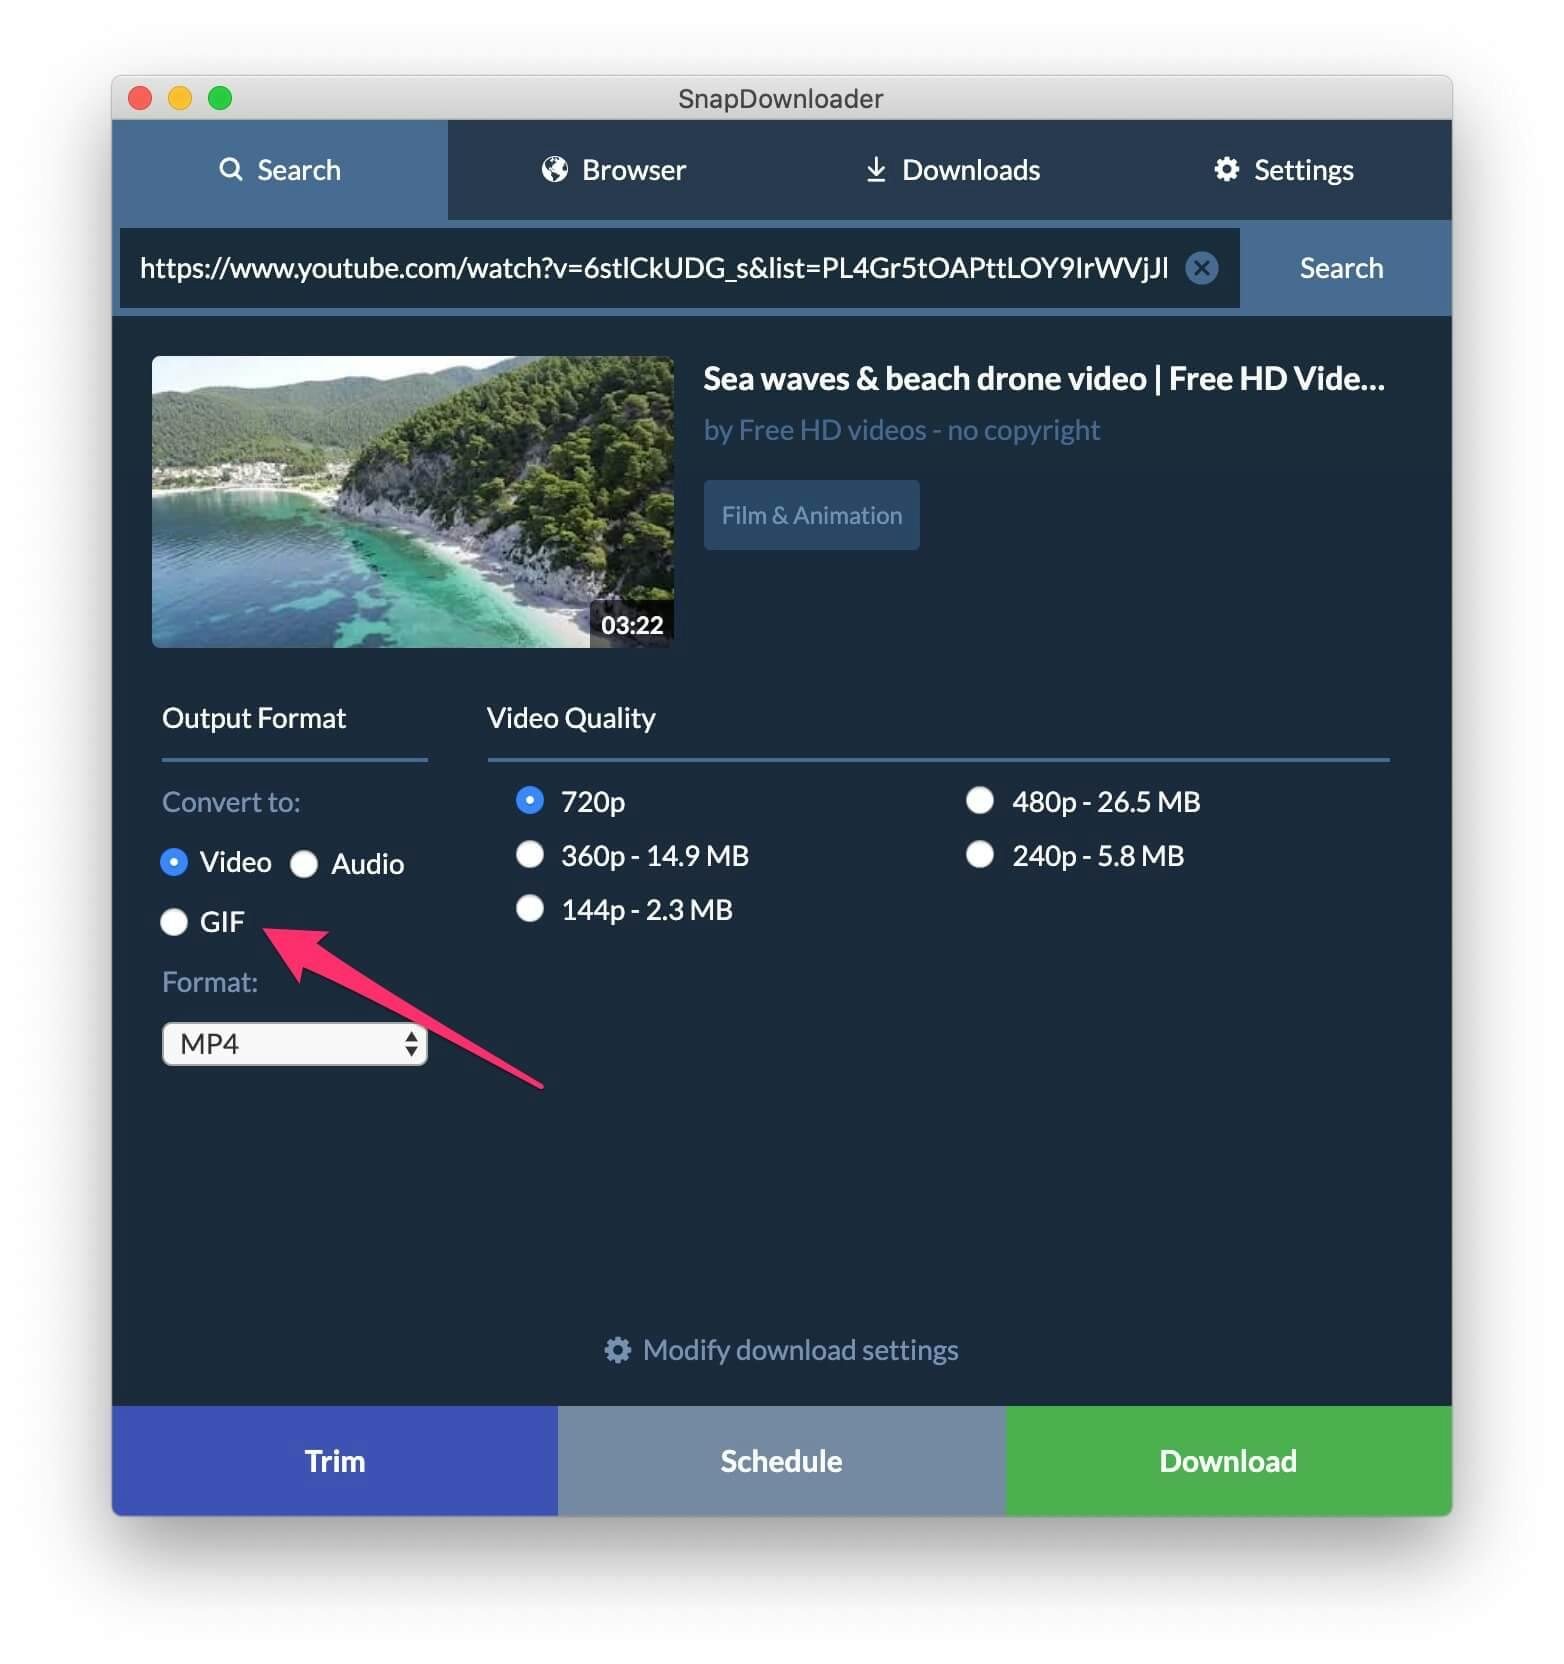
Once the search result appears, SnapDownloader lets you select the output format and the quality. You can convert to MP4, MP3, M4A, WMA, and many more formats.
Since you want to convert the YouTube video to GIF, select GIF under the "Output Format" section.
5. Select the starting and ending timestamp of the GIF
On the right side, you will find the GIF settings. Enter the starting and ending portion of the video to be converted to GIF.
For example, if you want to convert the portion of the video between the 2:20 and 3:20 mark, then enter the starting time as 00:02:20 and the ending time as 00:03:20.
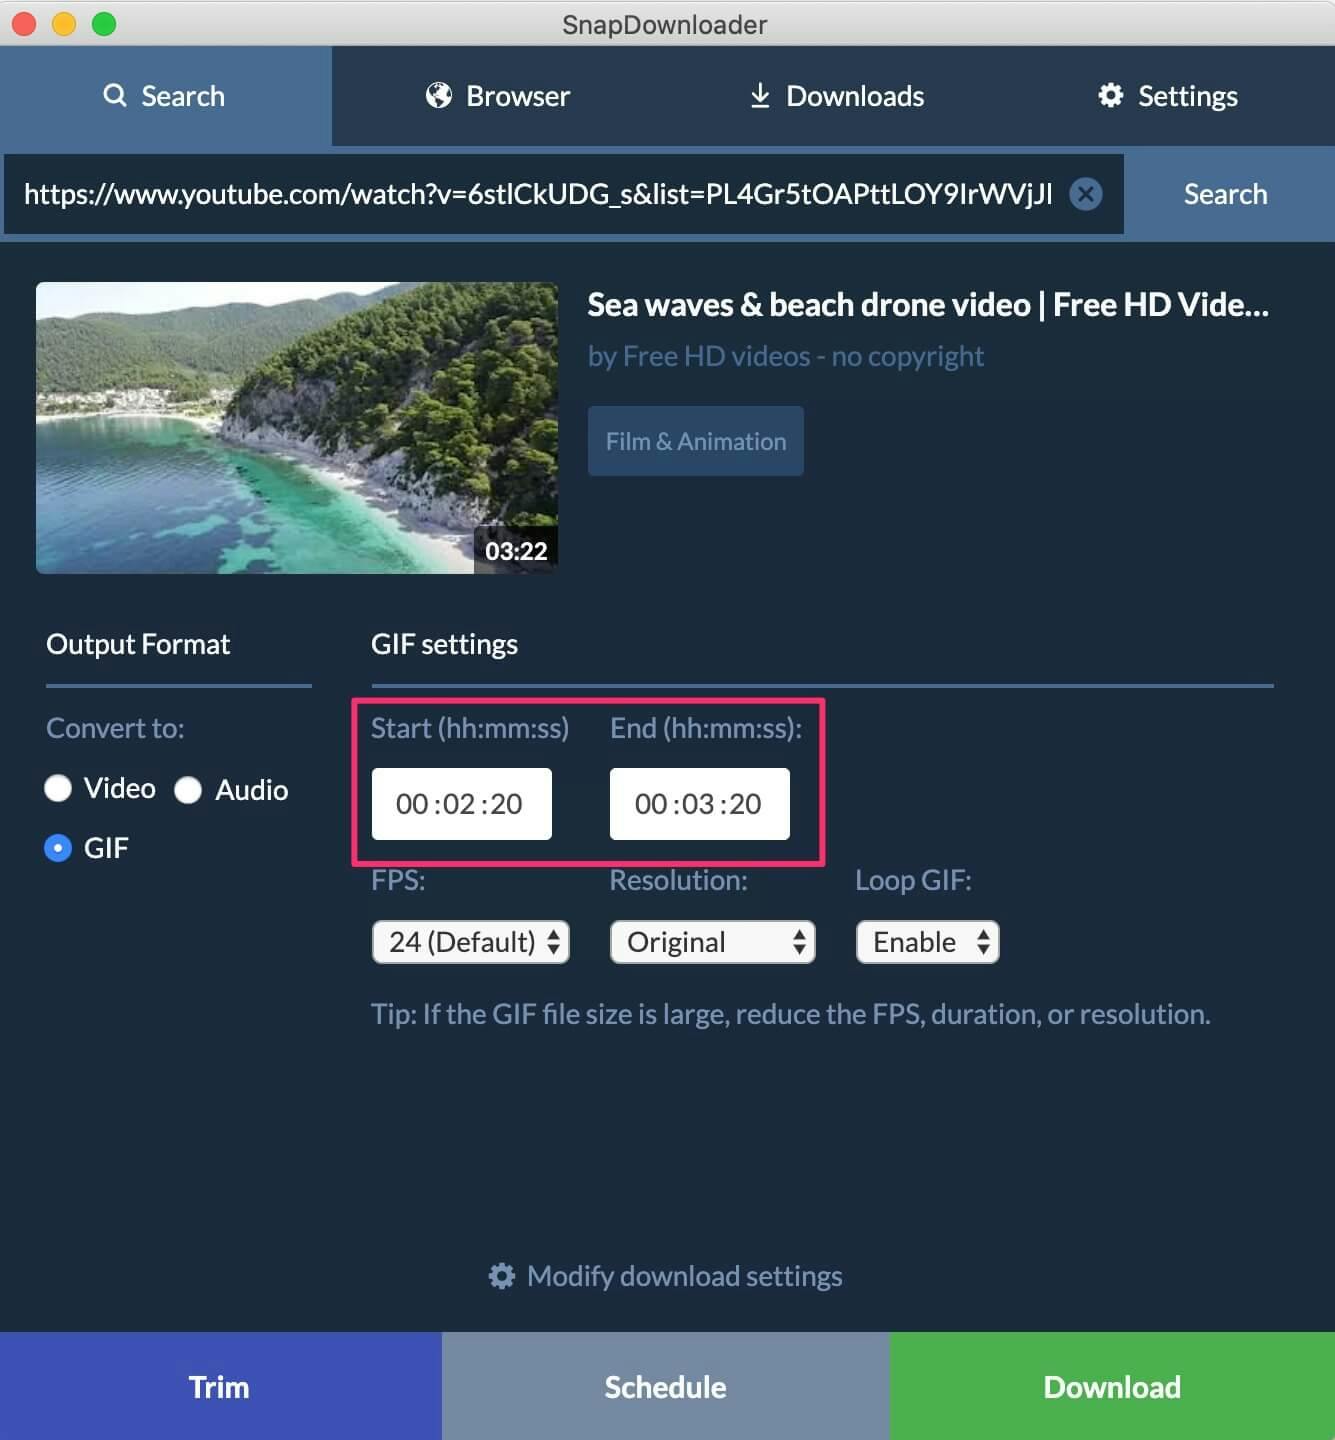
You can also configure the other settings such as FPS, Resolution, and Loop GIF. Here's what each of them means:
- FPS: frames per second (24 is the optimal FPS for GIFs)
- Resolution: resize the GIF to the size that you want. For example, the 320xAUTO option means that the GIF will be resized to a width of 320 pixels and the height will be determined automatically so that the GIF is resized proportionally.
- Loop GIF: whether you want the GIF to repeat endlessly or stop once it ends.
6. Download
Click on the Download button. SnapDownloader will begin to download and turn the YouTube video to GIF. The download progress will be displayed in Downloads > Downloading.
Once it's done, double-click on it to play the GIF file. To view where the file has been saved, hover over the download, click on the three-dot icon, and select "Show in folder".
Now that the YouTube video is converted to a GIF file, you can share it on any website or app such as Discord.
Wrapping Up
Creating GIFs from YouTube videos can be done quite easily using software such as SnapDownloader. This comes in handy when you want to turn a specific portion of a YouTube video into a GIF file and share it on other social media apps.
